



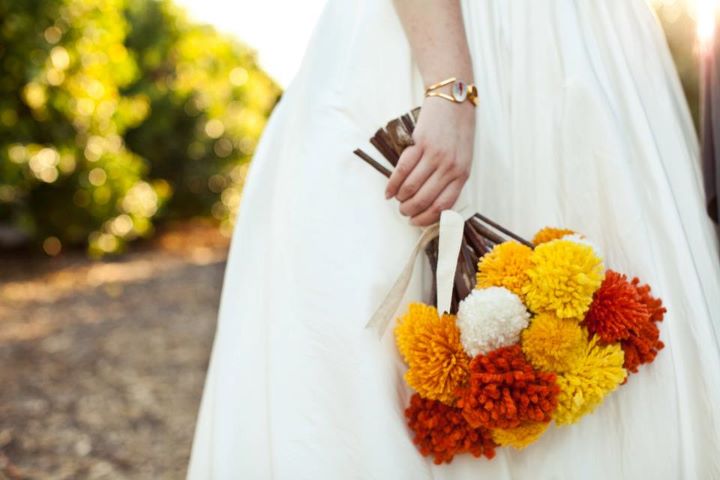
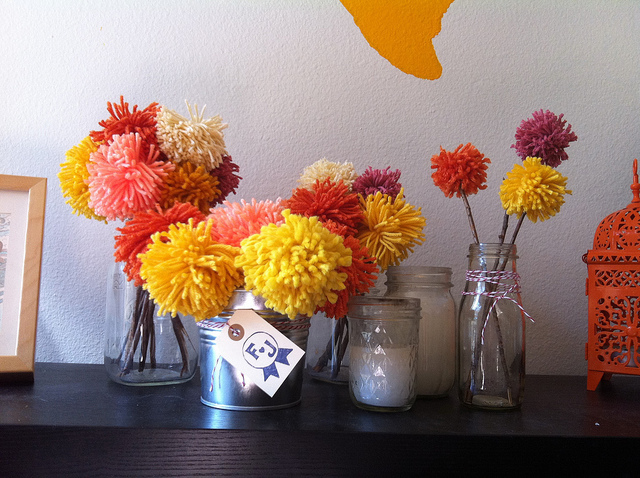
I’ve been asked to provide more info on how I made the poofballs for my floral-alternative centerpieces. There are other yarn flower tutorials out there, but none for the way I make mine. My method requires the LEAST amount of materials.
What you will need:
- yarn
- scissors
- two hands
STEP ONE
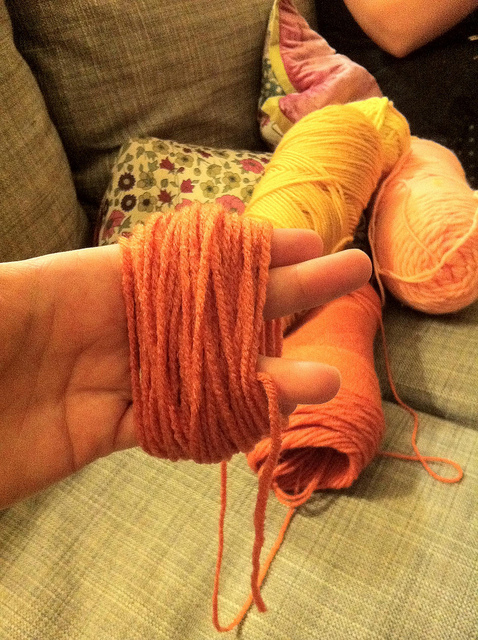
First, begin with yarn. Yarn is spun from a few different materials. The ones in this tutorial are acrylic but I LOVE the way wool yarn looks with this project. Grab about a 4″-5″ length of yarn and tuck it between two fingers, then begin wrapping yarn around two, three, or four fingers, depending on how big you want your poofball to be. It’ll look like this:
STEP TWO
Now beef it up! The more yarn you wrap, the denser and fluffier the pom will be. Next, cut your yarn with about 4″-5″ to spare. Grab the tail you already made when you began wrapping. You might have to dig it out from between your fingers if you wrapped tightly. Wrap these ends around the middle of your yarn tube a couple times and tie a double knot. It’ll look like this:

STEP THREE
Now for the messy part… cut ’em open. Use scissors to cut through all the loops you just made, on either side of the knots you tied. Find a pair of sharp, sturdy scissors for this, it’ll make things go very smoothly. I chose my tiny, pointy embroidery scissors:

Once you cut all the loops open (and have checked for baby loops you might have missed), use the scissors to trim the yarn ends down to get a uniform, spherical look:
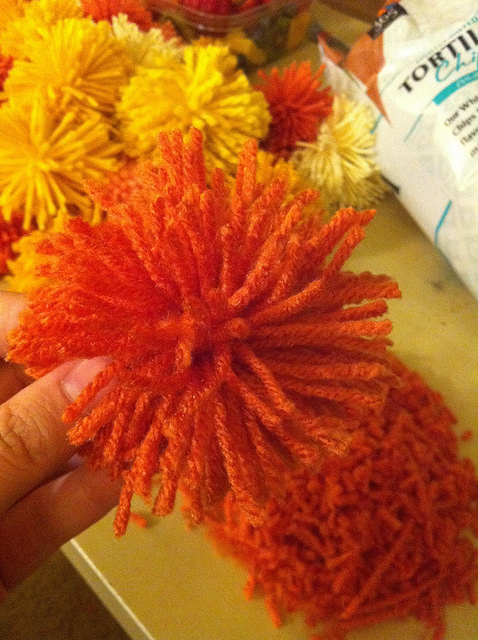
Now you’re ready to use these for whatever you wish!

I used hot glue to attach the middle of my poms to sticks. (Careful with hot glue, folks! I’m a seasoned crafter and I got a blister because I was careless.) You can also string these along a line and use them as a bunting-type decoration, dangle them from strings, shove handfuls of them in clear vases, make jewelry and headpieces with them… POMS AWAY!




15 responses to “How to make yarn poofball wedding decor in three easy steps”
Heads up to those who don’t normally work with yarn– if you want wool and you have a specific color scheme in mind, the yarn you want is Cascade 220, which is carried at most local yarn stores (but not the big box stores.)
Well that’s my evening challenge! Yay for pom poms!
I think this would also be cute for Dr. Seuss-themed parties.
I totally got Truffula Tree vibes from these too!
I agree, Dr. Seuss baby shower? It reminds me of The Lorax.
I used these for centerpieces at my wedding. If you want to skip gluing, you can take fabric coated florist wire and tie your ball up with that before cutting instead of using yarn.
I am super pumped that you all asked Jessica to be the DIY editor! I love her posts and am excited for more!
I love them!
We used to make these all the time as kids! Except we would use a ring of cardboard to wrap the wool around, and i think when you cut it open out can yank it out…not quite sure? This looks like a much easier alternative! I was considering making tissue paper poofs but might have to consider these instead cos they’re sooo easy!
I wonder what they might look like with led’s in them for a nighttime wedding, if using the same type of colors as in the pictures (particularly if you were having a wedding in the late fall and wanted a leafy look to the trees where the leaves got knocked out). Thankz for the ideas!
ooooooo – i love the pom pom bouquet!!
This is amazing! I can’t wait to try it!
I made a bunch of these last night, complete with sticks for stems. I posed them in a mason jar for effect. They look AMAZING!!! I cannot wait to make more of these for my wedding centerpieces!!!
I love these! I have been playing around with the idea of felt flowers but felt like they were missing something. I LOVE how you attached these to sticks! It makes them look so polished and complete!
Oh gosh, that bouquet is adorable! I’ve been looking for alternatives to flowers and this is right up my alley – it has such a cute, innocent vibe to it and I appreciate the simplicity of the tutorial. I’m betting you can toy around with colors and embellishments quite a bit too (especially if you do a bouquet), layering the pom-poms by size and colors to create a gradient effect and maybe even sticking some various charms and stems in between the pom-poms for a personal touch. So many possibilities! Thanks for posting this!