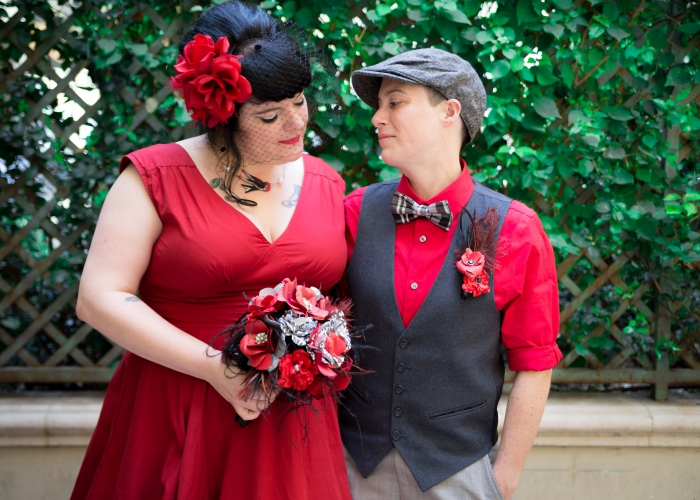
I'm a recently retired burlesque performer, so I have a lot of beauty products, and also some skills from years of gettin' fancy. But I was feeling a bit rusty (I don't wear much on the daily), so I wanted to play around a bit and take make-up inventory for wedding.
I also thought I would look up some eye shadow tutorials to try out some new looks. I ended up following along with this tutorial:
Although it doesn't deviate much from my typical dress-up look, I thought that someone out there might appreciate the link, plus I picked up a few new tips!
Here's my vintage-style makeup and hair tips for a burlesque-esque wedding day look…
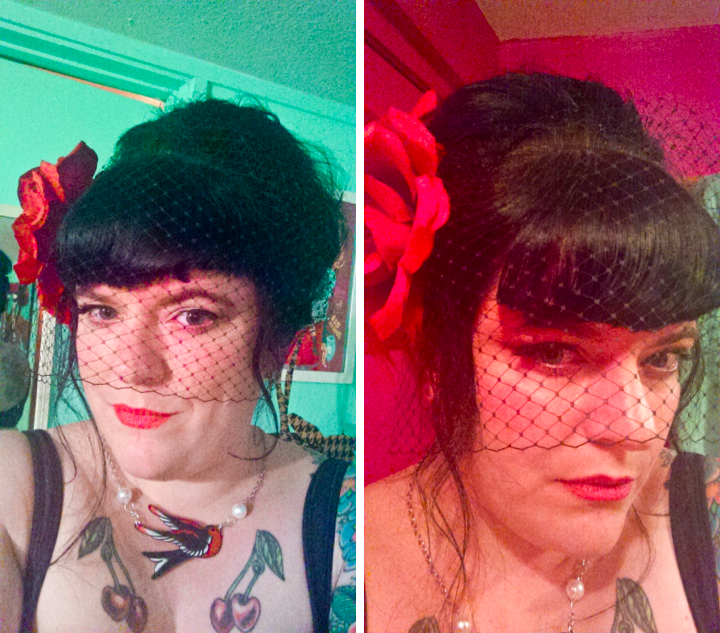
For my face, here are the products I used, and what I did with them:
First off, I hate how foundation looks on me and never wear it. If you love foundation, no problem! But if you don't like foundation or don't want to wear it, you don't have to. Not even for pictures or under bright lights. When I want a flawless look, I do use a few things to smooth out my skin tone, keep the shine down, and conceal blemishes, but I don't use heavy cake foundation.
Second, I use a mix of high-end boutique stuff and drugstore. I have tested some shit far and wide and these are my faves…
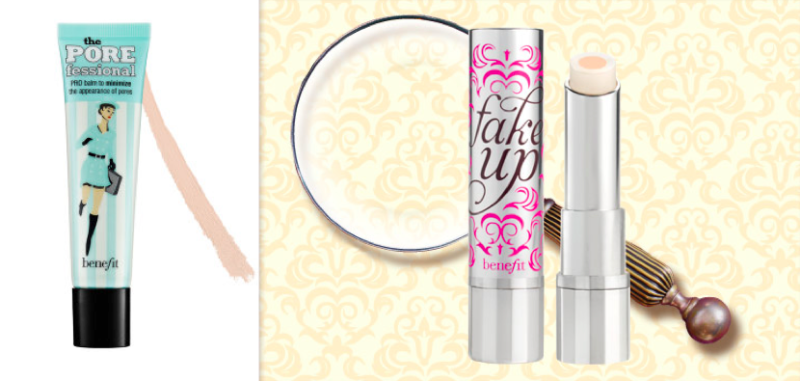
I start with this pore primer from Beneft, which is super light and just makes a nice base. I put it on my cheeks, nose, and chin. Then I use Fake Up, also from Benefit, which is one of my all time favorite products ever. It's magic. I dot it on my undereye circles, streak it down my nose, and on any red spots on my face. I finish with a light coat of Wet & Wild BB cream. I wear this shit every day. It's super light, goes on easy with my fingers, has sunscreen, is cruelty free, and makes my face look radiant. (FYI I can no longer find this in Walgreens and have to order online). Oh and then a nice fluffy brush full of finishing powder, translucent powder, to set (this is the one I'm using right now, but whatever works).
For my eyes, I just followed the tutorial, and here are the products I used:
- I start with primer. This is one of those things I assumed was a scam to get you to buy more shit, but it's for real. There are lots of expensive primers out there, and Urban Decay's is good, but my fave for the price tag is this Wet & Wild primer. Seriously, I once did my eye makeup with this, had a super sweaty dance party makeout session, followed by a shower, and ridiculous sex, and my eye makeup was intact the next morning. Primer will make your cheapest shadows look so much better, too.
- I used a crappy white pencil from NYC because it was the only one I had on hand, but ordered one from W&W and hope it's better.
- Black liquid liner — I have tried pretty much everything out there, and this is my hands-down, can't live without fave. I have REALLY oily lids, and every eyeliner except this one smudges on me. This one is to die for and is like $6.99 and you will have eyeliner on for days unless you take it off with oil.
- For my eyeshadow, I used the NYX Love in Rio trio and Wet & Wild Unplugged white shimmery.
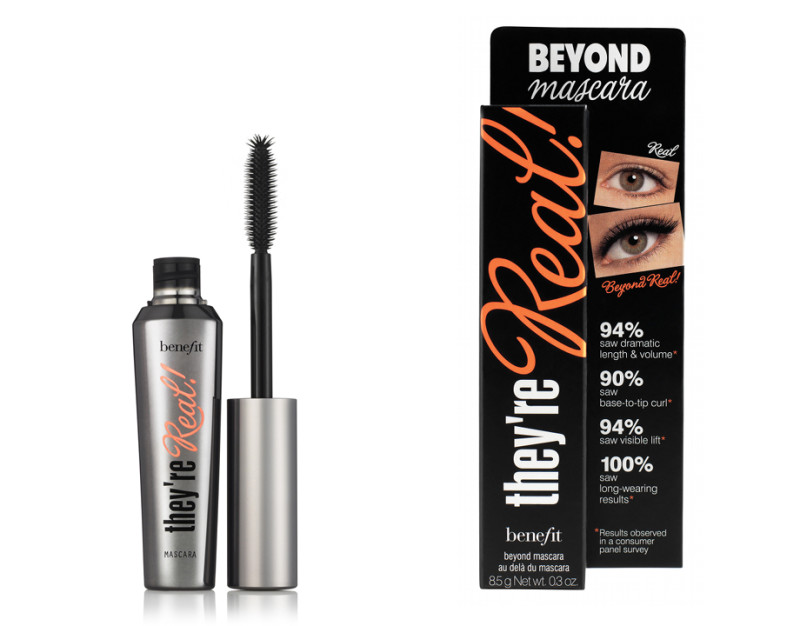
- Fave mascara ever: Benefit They're Real. I love that you can get this one in a tiny travel tube for like $10 at the Benefit store or Sephora.
- Fake lashes on top. I love them. Not totally necessary though. I really just like how they feel on my eyes — I feel immediately more dramatic and glamorous with the bit of weight on my lids. I love Ardell's at the drugstore or the cheap ones you can find at Daiso.
For my make-out ready lips:
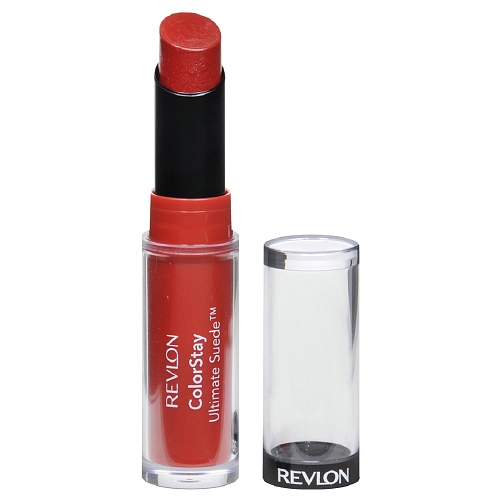
I brushed a bit of blush on the apples of my cheeks and then finished with a swipe of Revlon ColorStay lipstick in Finale, I think (the best long-lasting I've ever tried — doesn't come off on your coffee mug OR on your sweetie's face). I'll probably go with a top coat of Urban Decay Revolution (shade 69) for picture times, as it's a more vibrant red, but it's pretty transferable and I don't want to get lipstick all over her face when we make out in the limo later. So I'll wipe that off post-photos and stick with the ColorStay for the rest of the day. It's a nice natural red and goes well with the '60s hair and eyes.
For my hair:
I love this tutorial for a messy, sexy, but easy 60s bouffant. I'm going to try this one soon and see if the results are different. It looks a bit more challenging but also the back is prettier. FYI I used NO hairspray to get this volume, just a crap ton of teasing (and my hair was really really dirty, like a week dirty – I don't shampoo very often, which I've been told helps to protect it when I do heavy teasing like this). I took a class on teasing, and if you're new to it, you can't be afraid. Rat it rat it rat it! It WILL come out, whether by careful combing apart or getting in the shower and washing it out (and heavily conditioning after to smooth it back down).
That's a lot. I hope it's helpful for someone? I see a lot of questions around about DIY makeup and hair and I've picked up a few tricks from being a theater major back in the day to years of being fancy on stage and doing a bit of pinup modeling. I like sharing!


Dig those lipstick tips! Different shades/types for pictures versus kissin’! 😀
“I love this tutorial for a messy, sexy, but easy 60s bouffant. I’m going to try this one soon and see if the results are different.”
Were the “this tutorial” and “this one soon” bits supposed to be links to video hair-styling of awesomeness? Would love to test some new styles out before May!
Thanks so much for posting this!
I’m the author of the post. Glad you found it useful! Looks like the hyperlinks for the hair tutorials didn’t translate, but here they are:
This is the one I ended up using for my wedding hair, in the pics shown:
https://www.youtube.com/watch?v=HDjkMZR-el4
I like this one, too:
Hi! Could you tell me more about your accesories?
I love your headpiece, was it DIY? What about the bouquet?
I’m looking for something similar :3
Absolutely!
My necklace is from this Etsy vendor: https://www.etsy.com/shop/artallnight. Highly recommended!
I made my headpiece & bouquet. Headpiece was easy and quick – two large fake roses hot glued onto a red feather hair clip like this one: http://www.joann.com/red-ost-feathr-hair-clip/12245452.html#start=26. I just bobbypinned the netting directly in my hair after styling.
I loosely followed these instructions for my bouquet: http://www.elli.com/blog/paper-rose-bouquet/
Variations were I added various odds & ends from a collection of broken earrings & fancy buttons I had sitting around – hot-glued to the center of some of the flowers, and a little bird figurine tucked in among the flowers. I added black ostrich feathers at the base and tucked in some red feathers from the floral department, wrapped the stems in ribbon, and added as a fancy touch a cheap fake pearl bouquet wrap from the craft store. I made my wife’s bout to match.
Here’s one my favorite secrets that I just love to share. Though it’s hardly a secret anymore; I’ve actually shared it on this website before! I tell this to anyone who will listen, mostly because I love sharing money saving tips (As a single income single mom, I am notoriously tight-fisted), but also because after I’ve told people my favorite beauty tip, they often react with horror, so that’s fun to watch!
First though, let me just say that WOW Allison is some kind of beautiful and has some really fantastic tips in this post! I am shaking rah-rahs behind her most especially when she recommends Benefit’s They’re Real mascara. It is hands down the best mascara in the world. I have super short blonde eyelashes and They’re Real really does make it appear that I am wearing fake eyelashes. It wonderful stuff!
I am also a big fan of primer, especially during extreme weather. In the winter, primer protects your face from drying and chapping. In the summer, it holds onto your make-up, keeping it from sliding off in the heat and humidity. One of the many symptoms of Scleroderma (one of my five autoimmune diseases) are telangiectasias, which I have all over my face, hundreds of them. There are so many that my face is in medical journals, so as you might imagine, I never leave the house without make-up. In the past, I’ve been super self conscious about my make-up looking caked on, so when I discovered primer as a way to both smooth out my skin and hold onto my make-up all day long, I realized that I could wear less foundation as a result. But, holy mackerel, primer is expensive! Like, sell your kidneys expensive. At $10 an ounce for the cheapest brands of primer, I figured it out once that it’s like paying $1280 for a gallon of milk. For the more higher end products, well, let’s just say, “Hells no!” So I started digging around on the internet and read in a couple of forums that the active ingredient that makes primer a primer is the same ingredient that is used in “chub rub” (AKA Monistat Soothing Care Chafing Relief Powder-Gel), which is $3.33 an ounce ($5 for a 1.5 ounce tube). And, it works wonderfully! I’ve been wearing it for years and years and years. It is the best tip I’ve know! I highly recommend it. Matching ingredient lists is now something I do as habit. [Another good one, though not beauty related, instead of over-the-counter sleep aids, just pop a couple of Benedryl. They are the exact same active ingredient, but Benedryl, especially the store brand version, is much cheaper than the bottle marked “sleep aid.” ]
Just my two cents!
I will totally have to try that! Thanks for reading and for adding your tips.
This is honestly the first time I’ve ever seen permission to NOT wear foundation for the wedding. Thank you! I hate it, but it always feels like it’s supposed to be the one necessary makeup thing. (for my day job, I just wear eye makeup, sometimes light lip tint). My fiancé hates foundation on me as well, and now I feel justified in just leaving it off on our wedding day. Yay!
Glad to spread the permission! 🙂 I understand why makeup artists insist on foundation, as it can make their jobs easier for applying everything else. I also know that lots of people prefer how foundation works on their skin, and that’s totally fine. But if you are doing your own makeup and you like how you look in photographs in bright and natural lights when not wearing foundation, then you don’t need it. I have posed for a lot of shoots (including my wedding shoot) without it, and I’ve seen many pictures of myself performing under super bright stage lights without it, and I’m perfectly happy with how I look in those pics, so I’ll keep skipping it. I do love a light BB cream, though – blends in so light and airy and it doesn’t look or feel like I’m wearing anything!
This: “you will have eyeliner on for days unless you take it off with oil” made me realize that it might be awesome to also have a tutorial on REMOVING all this offbeat makeup. Honestly, I thought the only way to remove eyeliner was to just wait for it to wear off… my normal face soap doesn’t even touch it. It must be better for your skin to get it off somehow, so for now, I’m off to google how to oil it off!
Katy, that’s a great question! I love coconut oil for all sorts of uses. A dab of coconut oil on a cotton ball will get off the waterproof eye makeup and the kiss-proof long-lasting lipstick, and it’s very gentle on your skin and your eyes. You can buy expensive makeup remover for waterproof/long-lasting makeup, but I think coconut oil works even better (and if you don’t already use it, it’s also an amazing moisturizer for body and face, lovely massage oil, and really great lube as long as you are not using condoms – as all oils break down latex. You may already know all of that, but that’s for everyone’s benefit reading along).
I too adore coconut oil – for those of us with dry skin, it’s a blessing! But I’d like to make a quick note that it may not be ideal for the acne-prone.
Instead, get unscented plain ol’ mineral oil – look for fragrance-free no-additive baby oil, or snag the stuff that is marketed to clean and seal wooden chopping boards. Mineral oil molecules are too big to clog pores and cause breakouts!
Mineral oil will take off basically any kind of make-up, either just with your fingers and then wiped off with a soft cloth, or on a cotton ball. In particular, putting some on q-tips was, a complete game changer for me when it came to taking off mascara and eyeliner. It lets me be very gentle with that delicate skin around the eye while still getting every particle off!
Any retro/vintage hair advise for a curly girl? Thanks!