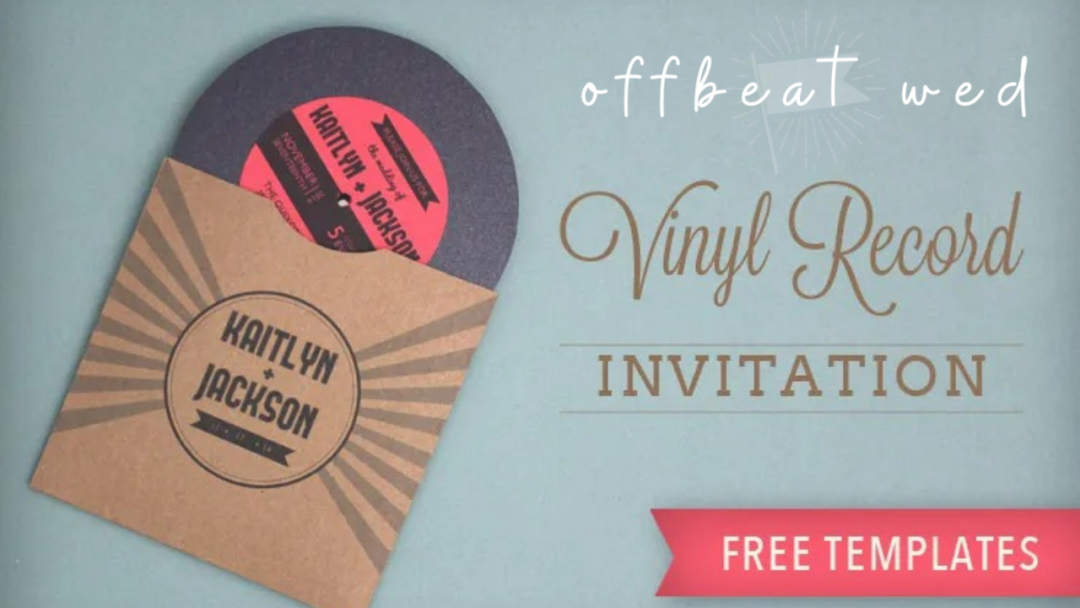
If you want your big day to be a “solid gold hit,” we have just the invitation for you. Check out this vinyl record invitation. “Side one” uses fun retro type for your names plus date and location details, then flip the record over to “side two” for details about the reception. The record sleeve, inspired by a 1979 Van Halen design, has your names on the front and RSVP and event details on the back.
If you and your partner are music purists and have a shelf loaded with vinyl, then be sure to grab the free template downloads and follow along with the photo tutorial below to create this fun invitation at home. Note that you can make this invite in any color scheme by simply selecting different color paper to print on.
Supplies:
- FREE TEMPLATE
You can grab a link to the files by clicking here - Printer (or get photocopies)
- Scissors
- Double sided tape
- Two colors of card stock (I used brown kraft and razzle pink)
- Metallic black card stock (faux vinyl record)
- Martha Stewart Circle Cutter (optional, saves time)
- Circle Punch (I used 2.5″ but you could use any radius)
- Making Memories Instant Hole Setter
- Fine tip silver paint pen (optional)
- 5.5″ square envelope
The Template:
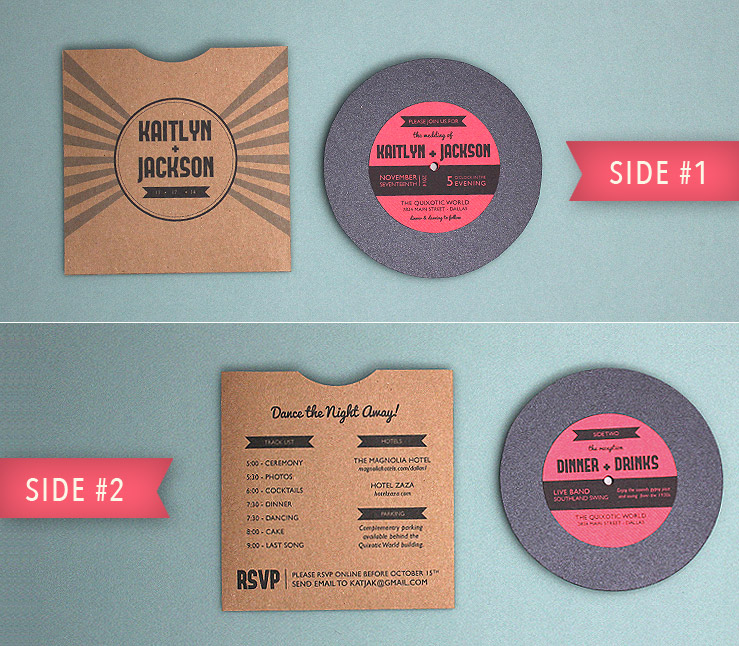
How to use the free templates to make your own DIY vinyl record wedding invitations:
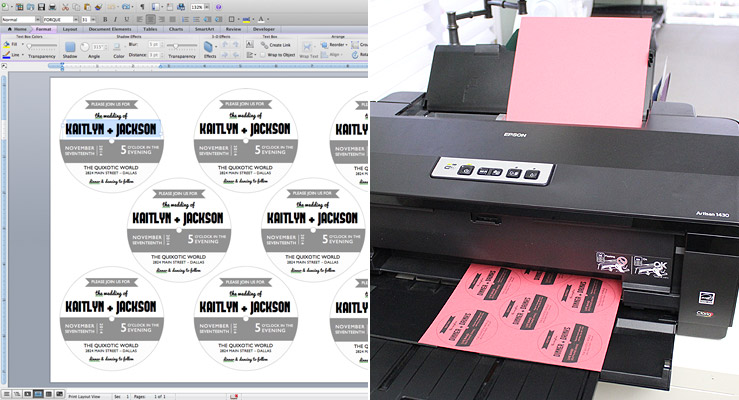
Step 1: Download, edit, and print
Download the template file here.
TIP: Before committing to print all your invitations, print one copy of each file and check for spelling errors, correct dates, layout, and grammar. Have a second set of eyes check over your work. Check twice, print once!
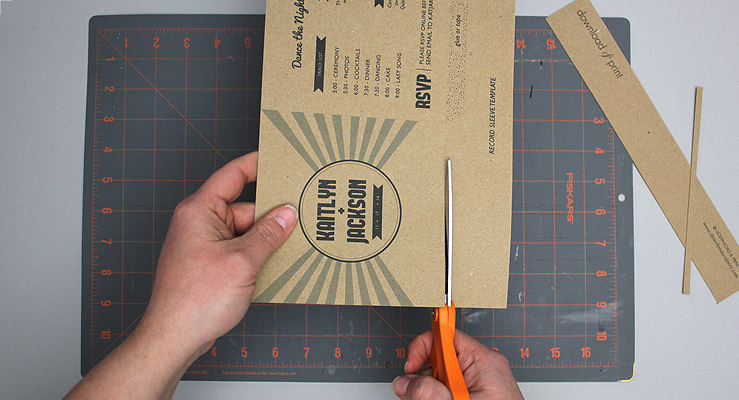
Step 2: Trim the sleeve
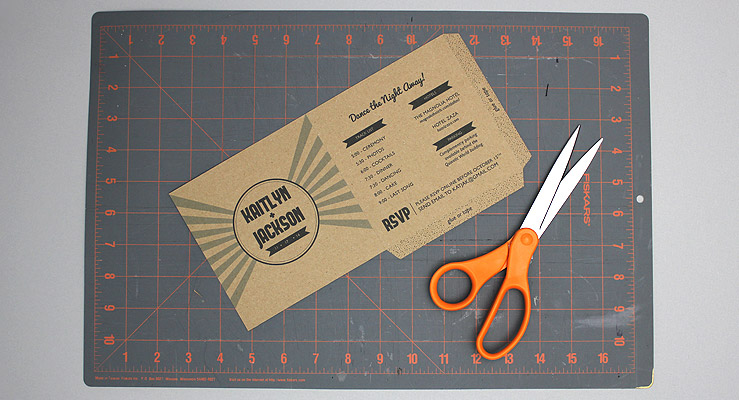
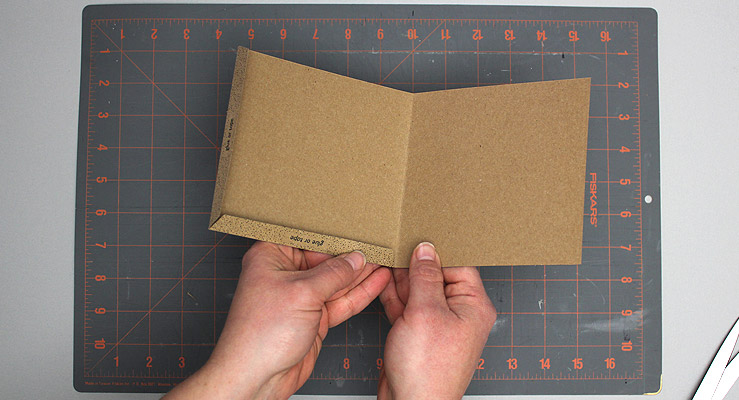
Cut out the sleeves along the trim lines. Score the sleeve down the center line and along the flap lines using a scoring tool or the back of an X-acto knife. Be careful not to accidentally cut through! This will help produce a nice, crisp edge. Fold the sleeve in half, design side out, and the flaps in.
Step 3: Tape the sleeve
Apply a strip of double sided tape to each flap and fold the sleeve in half, pressing down firmly with the heel of your hand to secure in place. A glue stick will also do the trick, but is a little messier.
 Check out these library card Save the Dates
Check out FolkFusionista's library card Save the Dates! They are pretty perfect, seeing as her future husband "J" is a Librarian and they are both... Read more
Step 4: Notch the sleeve
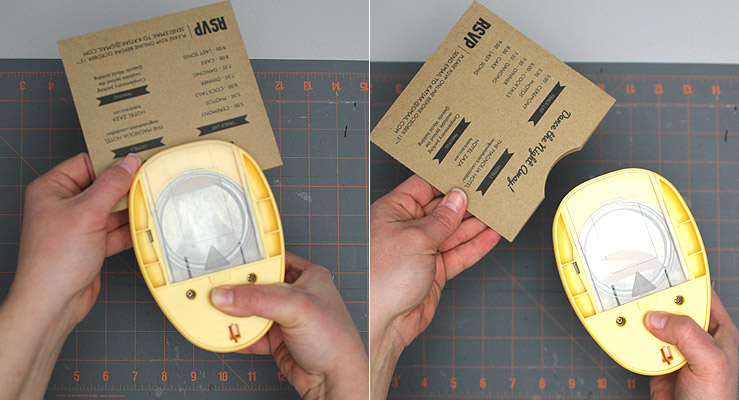
Take a notch out of the top of the sleeve with a circle punch (much faster), or plain old scissors. Or skip this step if you are out of time or out of patience.
Step 5: Cut records
You have two choices in cutting the records.
Option 1:
Grab the record template included in the printable files. Cut out the circles and punch a hole in the center using your Instant Hole Setter. Use this paper template to trace onto your black card. Don't forget to mark the center hole. Cut out the black circles and punch the center holes using the hole setter.
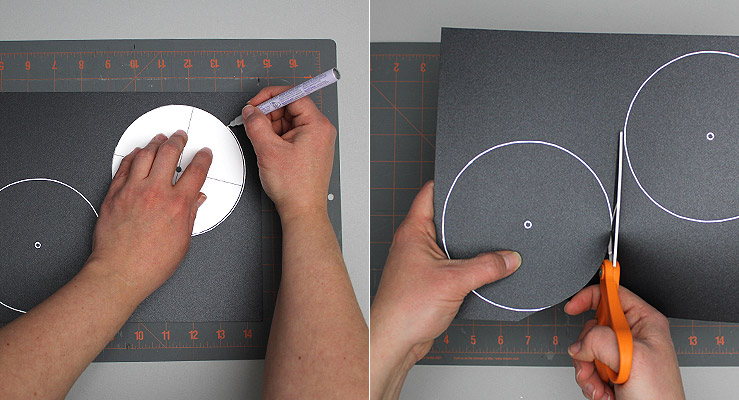
TIP: The trick to cutting smooth circles with scissors is to use long sweeping strokes with the entire length of the blade. Don't make little snips as your circle will end up with many edges. Hold the scissors still, and move the card.
Option 2:
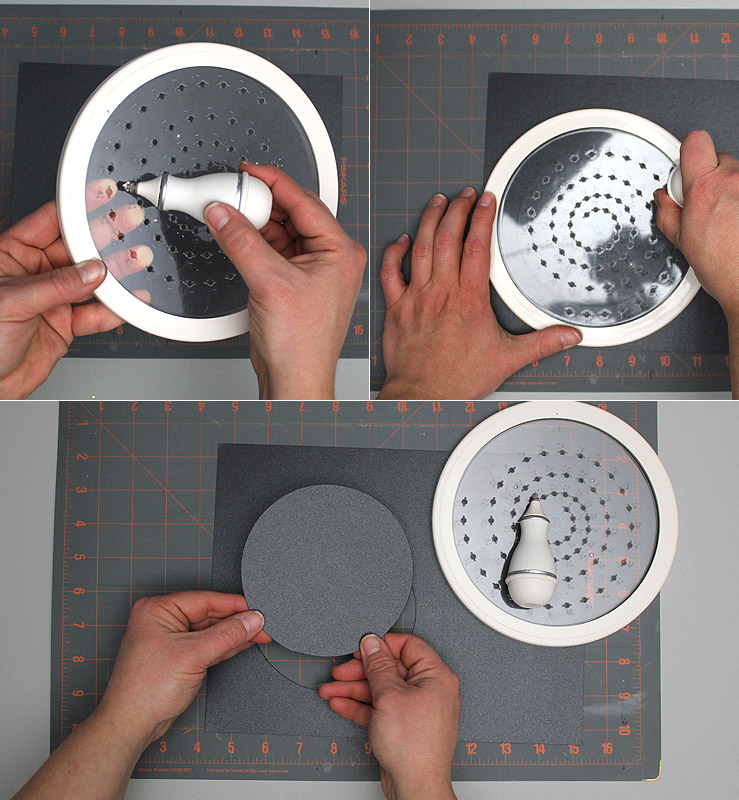
If you like gadgets and want to save a ton of time, get yourself a circle cutter and set it to 4.875″. Simply hold the cutting template to the card and run the included cutting tool around the edge. Hey presto, a perfect circle. You will yield two records per sheet using the circle cutter tool.
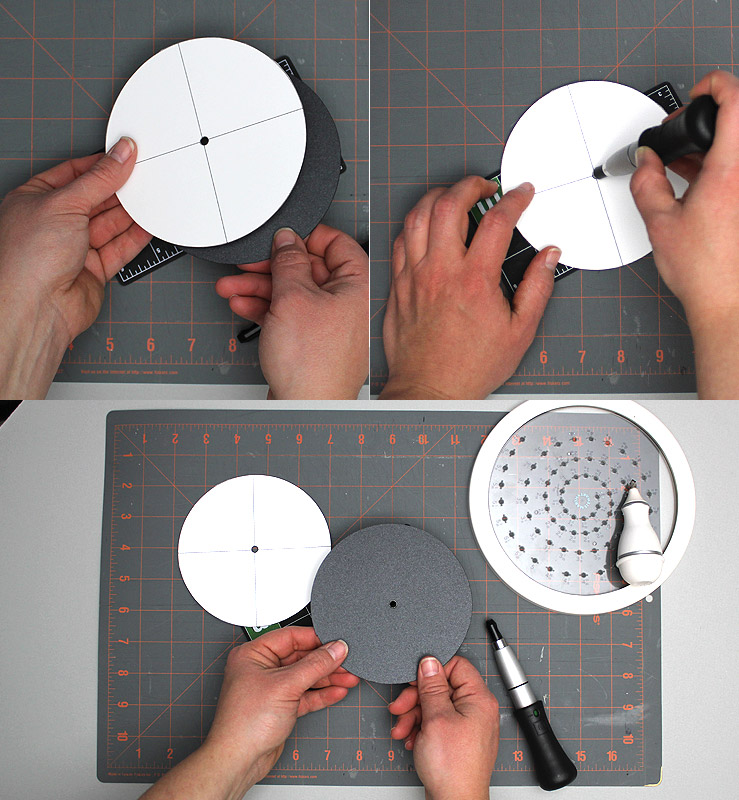
You will still need to punch the center hole with the hole setter.
TIP: You will find this entire process much easier if you engage the help of family and friends (even a scissor wielding-fiancé has no excuse to not pitch in), and form a production line. Give each person one task and work down the line. Have wine and cheese, or beer and pizza, on hand and make an afternoon of it. Perhaps have all the circles cut before too much wine is consumed though, or you may end up with some odd-shaped vinyl.
Step 6: Cut labels
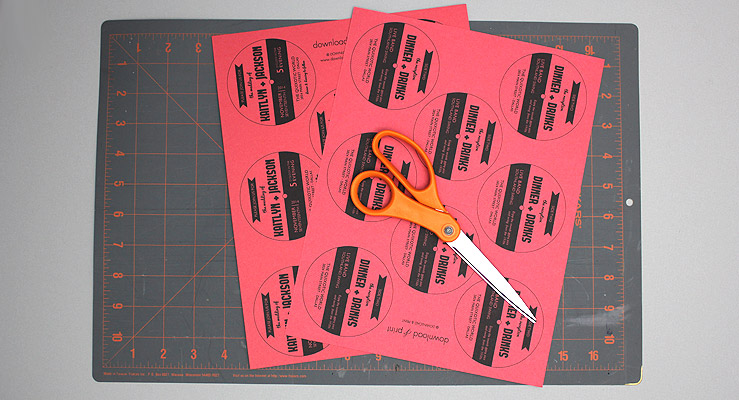
Cut out the front and back labels and punch the center hole.
Step 7: Attach labels
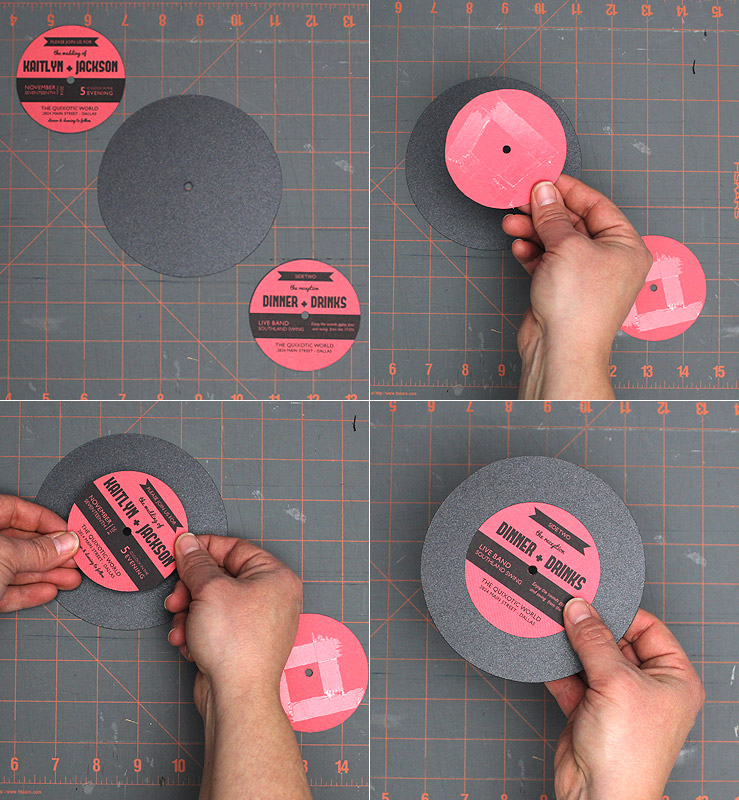
Using double-sided tape or a glue stick, attach a front and back label to each record. Use the center hole as your guide.
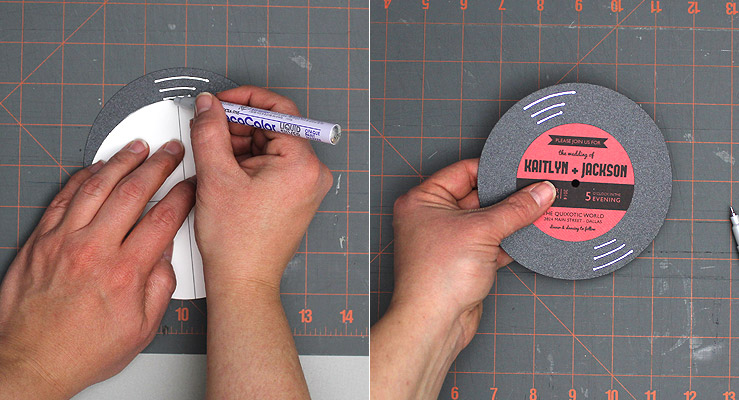
Step 8: Add glare (optional)
Embellish the records with the silver paint pen by adding “glare” lines.
The records are now ready to insert into the sleeve. The whole invitation fits into a 5.5″ square envelope for mailing.
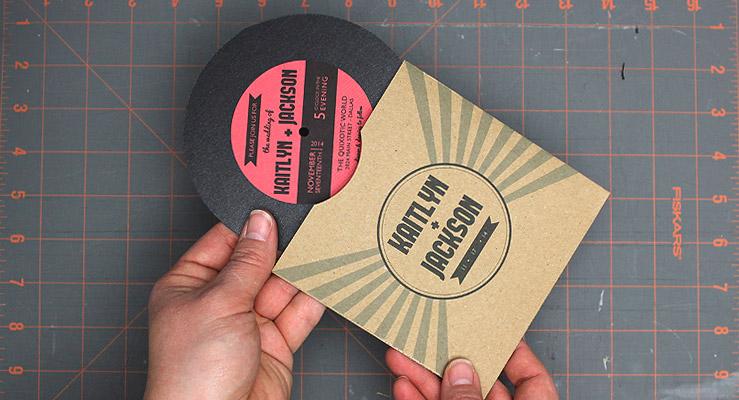
And there you have it. A no-treble tutorial with a rockin' result!


Goddamit could’ve done with this a few months ago… Guess what we did for invites, spent hours designing them and they didnt look anywhere near as awesome as these!
These look fantastic, but that tutorial reminded me why I’m staying away from the DIY (i.e. it looks like a lot of work, I’m not especially crafty, my wrists cramp easily, and I don’t have a lot of friends)!
funny I was just think that as someone who’s pretty craft-deficient, this looks like something that I could actually do! stoked to try this out…
Using this for our engagement party!! We are having a vinyl party with a B&W film rolling on our projector at home. These are perfect!
Now, that’s a lot of work, but it looks like it really paid off! Very cute idea!
I’m planning a music themed wedding and these invites would be absolutely perfect. It would be a lot of work and I’m not the most crafty person, but I’d have my lovely crafty sisters to help me 🙂
Thanks for your very generous sharing. I will be using these for my wedding in July. So have saved us lots of time!!
Thanks for the positive vibes everyone! I hope these invites help you rock out on your big day!
Thanks for this awesome idea! My mum and I are having a joint 21st/50th at the end of the year and its a grease/1950’s theme! Tweaking this just a tad and they are going to look fabulous! Thanks again! x
I can’t seem to open the front and back record label in Microsoft Word. The other 2 do however. ???
Are you able to attach it so I can open it in Microsoft Word as it’s asking for winzip and I don’t have that on my computer. Many thanks!
Hi Jessica, Lisa here from Download & Print. Can you please email me through the website and I’d be happy to send you the templates. http://www.downloadandprint.com/support/
Thanks Lisa,
Have emailed you
Thank you so much!
Jessica
Oh no, I haven’t received the email! Please try writing direct so I can email you the templates: lisa @ downloadandprint.com
Done : ) Thank you so much! The Vinyl Record invitation template is perfect for what I am after. Many thanks!! Please let me know if you get my email.
I love this idea! I’ve been searching for a diy invite for my daughter’s 9th music-themed/rock star/pop singer/karaoke party! I CAN do this!!! Would you mind emailing the template to me?
So excited to get started!
BUT I don’t have access to Microsoft Word. I’ve got a Mac.
You can personalize the template and add your text with Mac Pages or Microsoft Word for Mac.
Hi Melody, this invitation will be so cute for your daughter’s music themed birthday! The template will work on a Mac in Pages, and you can download all the files here: http://www.downloadandprint.com/free-vinyl-record-invitation-template/
Good luck with it!
Hi! This is exactly what my fiancé and I were looking for! Thanks so much for providing the templates. However, I had a question regarding the size. I see you require a 5.5″ square envelope- the post office rate is more expensive for square envelopes. I was wondering if it will fit in a 5.25″ x 7.25″ rectangular envelope so we can pay the regular postage rate? We may need to make about 200 invitations, so we are trying to budget everything we can. Thanks again!
Hi Cher, I’m glad you love it! The finished invitation will fit in a 5.25″ tall envelope as the record sleeve is 5″ square. The thickness of the card you use will also play into this a little. Just download the free template and give it a go before you print off 200 copies to make sure you are happy with the result!
Hi! I had a question and request- do you think you can send me the templates that are completely blank? We want to use the size of the templates, but redesign the sleeve and labels with our own designs, pictures, etc.
I can only delete the text, but not the image design on the front sleeve.
Thanks so much! Excited to get started on this fabulous DIY project!
Hi Cher, you can download PDFs of the blank templates at the links below. If you would like a different file format just let me know what program you plan on using to create your graphics.
Record – https://s3.amazonaws.com/dnp-72062841/record-blank.pdf
Sleeve – https://s3.amazonaws.com/dnp-72062841/record-sleeve-design.pdf
Hi, in sorry, would you be able to send these files in PowerPoint format? We can’t easily edit with PDF. Thank you!! We are excited to move forward with this project!
Hi Cher, I don’t have the template in PowerPoint, but you can download the Word files at the links below. You should be able to do everything in Word that you can in PowerPoint, and the Word files will print high res. You can add text boxes and insert graphics.
Record – https://s3.amazonaws.com/dnp-72062841/record-blank.doc
Sleeve – https://s3.amazonaws.com/dnp-72062841/record-sleeve-design.doc
Hi Anna,
is there a way that you could supply me the indesign-document? My friend wants to have your brilliant invitations for her wedding, with a little bit of extra-things …
Best
Ruth
PS: Great artwork!!!!!
Hi Ruth,
Thanks for stopping by! Unfortunately we don’t use inDesign. The files were created in Illustrator. If these files will help you I’m happy to provide them. Shoot me an email at [email protected].
Lisa
Hello!
Greetings from Poland! We were so happy to see those free templates available to print – they look just as we wanted for our wedding! It was way to awesome to sit with our families and start a small factory (2 hudered invites) – we had such a great time! Our friends told us they look amazing, and the fact that they are hand made (beside the tmeplate ofcourse) makes them special and even more admirable :)) Had lots of engaged couples asking me to send them the template since then! The wedding is in August, and this month we will be sending the invites – can’t wait!
Thank you so much for uploading this, can’t be more grateful 🙂
Hi Sylwia, Wow! 200 invitations is a lot! I’m so glad you had fun making them with family and friends and that they fit in perfectly with your wedding theme. Congratulations for August!
Perfect for our Girl Scout “He and Me” Sock Hop!!
What a great idea! I would love to see a picture of your sock hop invitations! [email protected]
Hey all, I don’t know if anyone has mentioned it (I scanned the comments but didn’t see) that instead of cutting out the records by hand use a Creative Memories circle cutter. Less than ten seconds, perfect circle. Just do a search and you’ll see what I mean. I’m totally using this for my parents fiftieth wedding anniversary and I’ll use the CM circle cutter instead. 🙂 thanks for showing us this! AWESOME!
Will the template for the envelope fit an actual cd/dvd? I don’t have one handy to measure. Thanks!
Hi Kestrel,
The CD case in the template is 5 x 5″, and will fit a real CD or DVD. These are about 4 3/4″ square.
Cheers,
Lisa
I was needing the black record template and the templates are no longer working is there any way I could still get it??
Hi Amber!
I’m so happy you want to use the templates. You can download all the files here: http://www.downloadandprint.com/free-vinyl-record-invitation-template/
Have fun with it,
Lisa
Hi I am loving your free record templates and was wanting to use the invitations for my upcoming 40th birthday party. Unfortunately there seems to be a problem with the record label template and I am unable to open the file.
Hi Sherryn,
I’m happy to hear you love the record! All the templates can be downloaded here: http://www.downloadandprint.com/free-vinyl-record-invitation-template/
The record label template is a zip file which contains two Word documents. It will open slightly differently to the other files. If you are still having trouble with the download please email me at [email protected] and I will email you the template.
Cheers,
Lisa
Could you by any chance tell me the size of the center circle by Amy chance? I’m trying to make these super simple and have a circle cutter.
Thanks for your time
R/
Angelica
Hi Angelica,
The center label is just shy of 3″ in diameter.
Cheers,
Lisa
Hi, these templates are great. Thank you for supplying them! I am just wondering if there is any way of changing the colour of the strip in the centre from black to navy. I can’t seem to edit the fill on Microsoft word.
Thanks,
Aisling
Hi Aisling, I’m so glad you like the template! Unfortunately there is no way to change the color of the graphics. The editable component is the text, you can choose the text color and font. Cheers, Lisa.
Does anyone know what kind of envelopes to buy to send these out?
Hi Kristin, thanks for checking out our invitation! The record will fit in a 5.5″ square invitation. Have fun with it! Lisa
HI – I’ve been using this great template for a friend’s wedding invitations, but can’t seem to get the text boxes on the side one record sleeve to behave. The ‘5 in the evening’ part won’t appear properly and allow me to change it to ‘2:30 p.m.’ It looks as if there are two or more text boxes on top of each other and you can’t find the edges! I’m using Word in Windows 10 – what am I doing wrong? All the other templates seem to be behaving just fine!
hi, i would like to use these however i notice the black and white option cannot be changed? i really just need the record shape; is there any way to do that?
Hi, I would like to use these, but the link doesnt seem to be working
Which link is giving you trouble? I just tried clicking all the downloadandprint.com links and they seem to be working, but let me know if I missed one! <3
Hi, I can’t download this. It’s amazing and would love it. Thanks