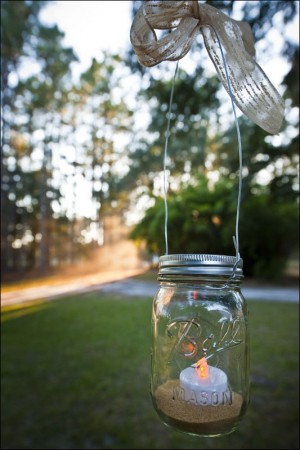
BerettaFleur recently made her own hanging Mason Jar tealight holders to illuminate her wedding venue. Here's how you can do the same.
Things you will need:
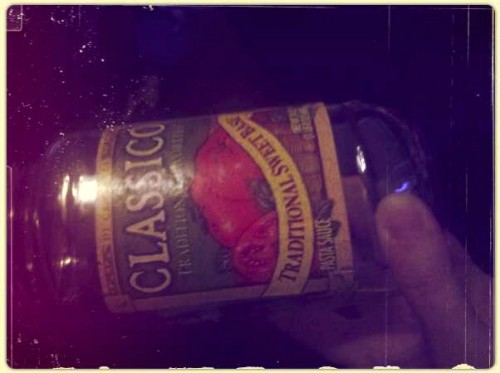
- Jars: vintage Mason, modern or ball Mason, or simply Classico pasta sauce, which comes in very old-style jars once you remove the lable and re-purpose it.
- Heavy floral wire: I bought two rolls.
- Wire cutters
- Tealights
- Ribbon (optional)
- A long-handled lighter or matches to eventually light them
Step 1: Peel labels off jars (if they have labels) and wash them.

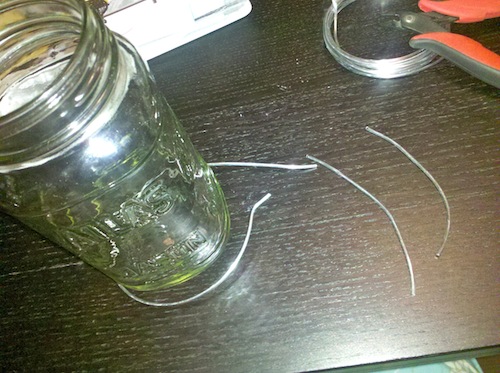
Step 2: Wrap floral wire loosely around the bottom of the jar to get an idea of the length you'll need. Leaving it 1-3 inches longer, cut the wire. (This will go around the mouth of the jar.) Make it into a circle, but don't close the circle off.

Step 3: Cut two more pieces of wire, about 3-4 inches long each. (These will be handles for the wire hanger or ribbons.) Position the shorter pieces in loops on opposing sides of the circle wire. bend then so that it attaches in a loop around the center circular wire, like handles. You'll want them both placed under and then bent up over the wire so that they don't risk coming undone. Fasten them closed around the circular wire by bending tightly or even twisting, then clipping off loose ends with wire cutters.

 A literary table runner PERFECT for bookish weddings
Here's an amazing idea with the DIY instructions to go along with it for a table runner, perfect for you literary types.
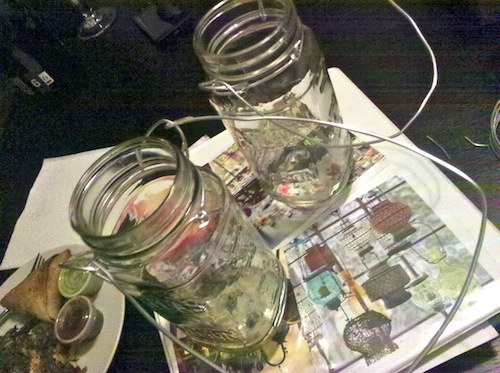
Step 4: Loop the main circle piece around the mouth of the jar, under the lowest lip, with the handles intact and flipped up. Twist the ends of the circular wire to tighten it around the mouth of the jar,, as tight as you can, then cut off the excess. (If you twist it tightly and then cut, rather than just cutting it to size in the first place, there are less pokey ends to deal with.)

Step 5: Loop one final long piece of wire around the two “handles,” or thread long yarn, rattan, or ribbon through the handles, making a large loop, and tie in bows. It's up to you — I did wire. Just make sure it's far enough away from the mouth of the jar so it won't like, catch on fire.

Hang them alone, color them with watercolor paint or glaze for a colored effect, or group them together for a chandelier-like effect. You can even hang them with ribbon instead of a wire handle. Enjoy!


Gorgeous!
And so simple, too!
I’m going to rock this project so hard. SO HARD.
Love this project! I like the idea of painting them with watercolor paint or glaze for a colored effect, too. Oh, and I found a website with instructions for coloring the jars if anyone is interested http://bridalbuzz.blogspot.com/2009/01/glass-jars-turned-vintage.html
Bookmarked! I’d had this DIY project on my agenda so perfect timIng. Did you put sand in the bottom of the jars to keep the candle from sliding? In the first photo it looks like the lid is on. Surely that put out the flame though? Or could you poke holes?
I think it’s a battery operated candle, just as they look the same as the ones I have.
i rocked this once for a party, but used copper wire with iridescent beads to give it some more sparkle. it kicked it up a notch.
I did something similar to this to decorate the trellis I used in my wedding, except we just used the jars’ screw-on rings to secure ribbon that we’d looped over the trellis, and then we put flowers in the jars. Actually, that’s what my flower girls carried, too (since I’d totally forgotten about giving them anything to carry until the night before). I wish I could remember where I’d seen the idea, but it was SUPER simple and quick.
Thanks all! I did not take the first photo, but the last one is mine. I did not use sand but that is a great idea! Also would prevent a bunch of wax spillage in the bottom. Happy Jarring! xoxox – Beretta
Sand works, but glass marbles let light shine through and of course come in all kinds of colors. Here in Seattle, there’s a company called Bedrock Industries that sells recycled glass bits in lots of sizes (from sand to river-stone size) and nearly every color, so that might be an option, too.
Also, it’s really easy to color glass jars using colored tissue paper (the kind that’s used for gift wrap): Tear the tissue into rough squares, dilute some white glue with water, and use a small paintbrush to paint on the glue one small area at a time. Stick the paper on and use the brush to smooth it out and cover it with more glue. Then paint a bit more glue on and stick another piece of tissue on so that it overlaps a little with the first. And so on. Do the bottom half of the jar first, let it dry upside down, and then do the top half.
thanks, I’ve been trying to figure out the best way to tissue paper mason jars. Good explanation!
I have been wanting to make some of these for my wedding, but I have had trouble finding the right kind of wire. All the floral wire I have found looks too flimsy. What gauge did you use?
I’m not sure of the gauge wire I used but it was definitely not the thickest/thinnest they had. The jars I made are not heavy, so about a 2cm thick would do it.
2 cm? That is not wire anymore but rebar for buildings… Didn’t you mean 2 mm perhaps?
I’m using blue Mason jars for my vases, as Mason is my last name!
Be careful if you use antique Mason jars (i.e. the blue ones) as lighting. I’ve heard several anecdotes about the jars cracking/exploding if there’s a real flame inside, and they may contain lead. It’s never happened to me but that could make for a far-too-exciting wedding moment.
I did hear that too but I wasn’t sure if it was an urban legend… hello Mythbusters? 😉 Mine were not antique and so did not explode.
Could you use a votive or other candle thats a bit larger than a tealight (for longer burning time)
Love this project! I asked my husband about the wire. He said Armature wire in 8 or 10 guage would work. They make it in aluminum so it is easy to bend.
Beautiful! I love the sand at the bottom. I am actually going to try and mix in some coloured sand to match the decor for an engagement part.
Adding sand at the bottom of the jar adds a creative effect. Also, hanging the in weddings would add in more romance in the air. Love this!
The first picture by Geoff Johnson is from my wedding in October 2010. Had no idea y’all put it up here. My bridesmaids, my husbands groomsmen, and I made about 50 of the mason jars for the wedding. Thanks for featuring my DIY wedding in your blog 😀
I think the sand in the bottom helps keep direct heat off the jar, making it less likely to crack.
How do you handle water drainage if you leave them outdoors indefinitely – assuming it will eventually rain. Can you somehow drill tiny holes in the bottom of the jar?