We talked about etching glass using templates a while ago, but what if you want to free-hand? Here's how puffy paints can help you do so.
Personalizing some fabulous glassware is a great way to make a thrifty find into something one-of-a-kind.
Whether you're etching a pair of toasting flutes, personalizing a couple of pimp cups, or making your own etched beer steins, here's a method for free-handing your finished look for something that is totally your own using just a handful of materials.
Materials and Tools:
Puffy Paint (Fabric paint that's puffy, in little hand-held squeezy bottle form, like Tulip Puffy Paint. You'll find this in a craft store or craft section of many stores. Needs to be puffy. Trust me — this way it forms its own barrier for the etching cream.)
 Etch your own toasting flutes. Mmm… toast…
Here's a DIY option to make your own personalized awesome toasting flutes with glass etching and a toast them. (Get it?!) Seriously, glass etching is... Read more
Etching Cream — also from craft store. I like Armour Etch and a small bottle is just fine. You don't use a ton of it on any single project, generally.
Glass(es) to etch
Masking tape
Special Note Regarding Puffy Paint: Get a dark color that's easy to see on the glass. Using a white puffy paint is a bit harder than using a nice dark color. I used black paint for this tutorial.
Procedure
Step 1: Clean and dry your glassware. If there's any residual stickiness from a pricetag, a bit of nail polish remover should help.
Step 2: Use your masking tape to mark off a straight line on your glass. Putting the tape on the inside of the glass lets you use it as a guideline without it getting in the way.
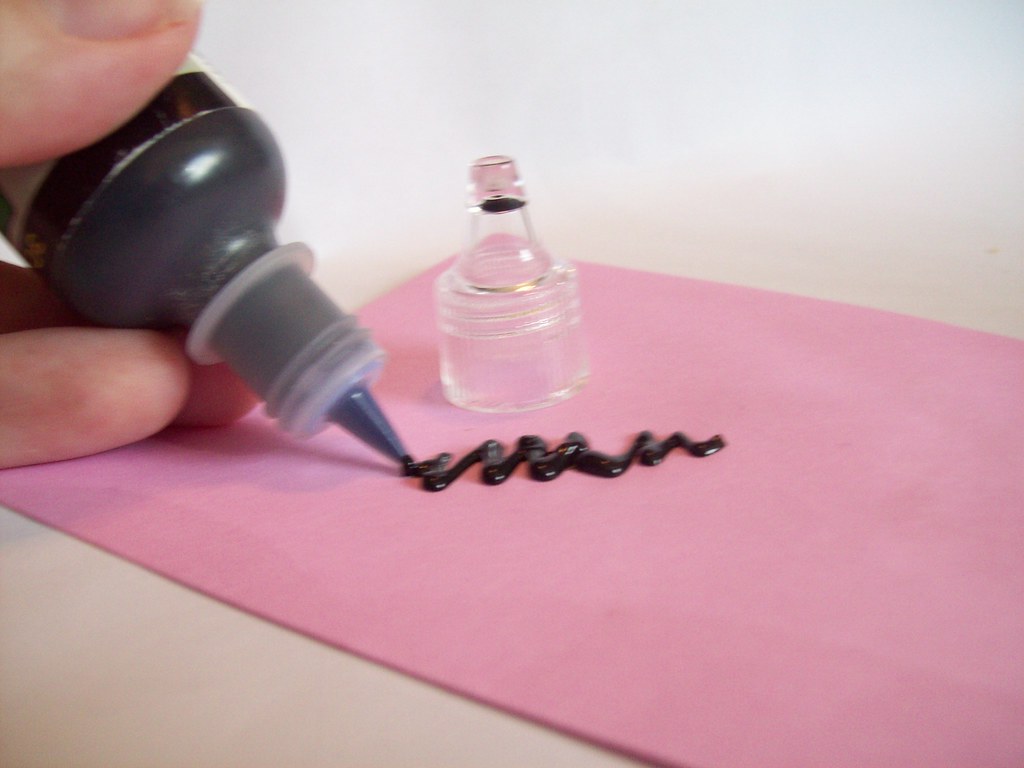
Step 3: Shake up and test the puffy paint on a piece of paper or paper towel to get the feel for how much pressure to squeeze with as you write.
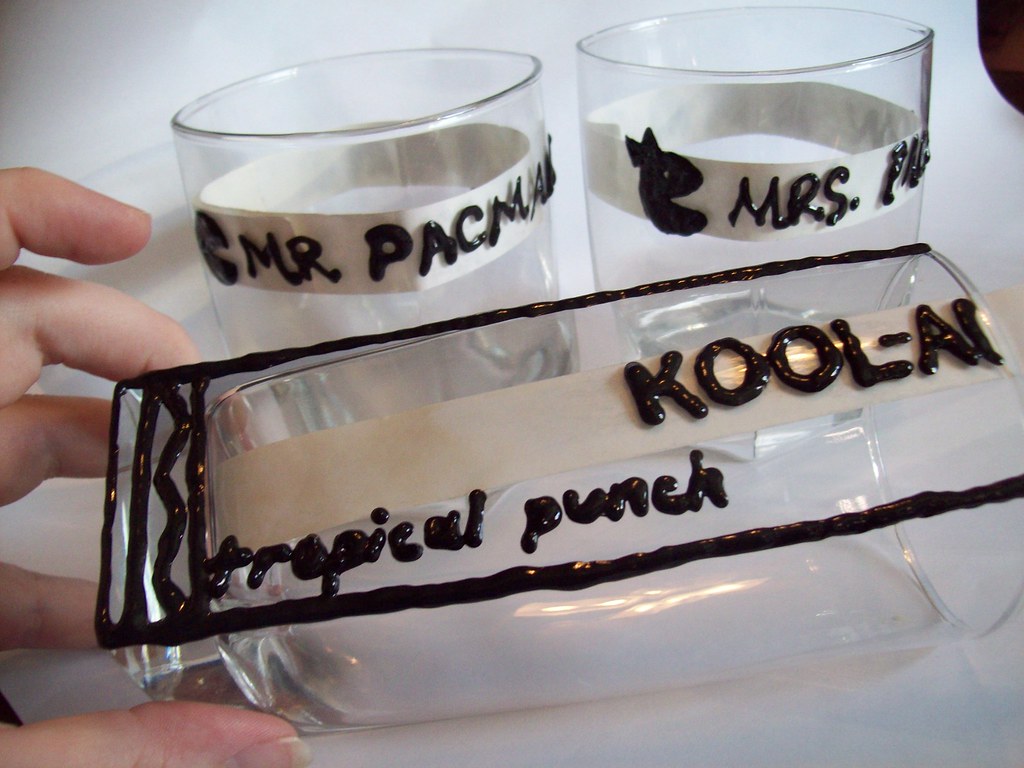
Step 4: Using your masking tape as a guide, like the line on a loose leaf paper, write your name or message on the glassware. Alternatively, draw your picture or pattern. Remember perfection isn't the point –- this is freehanding, after all.
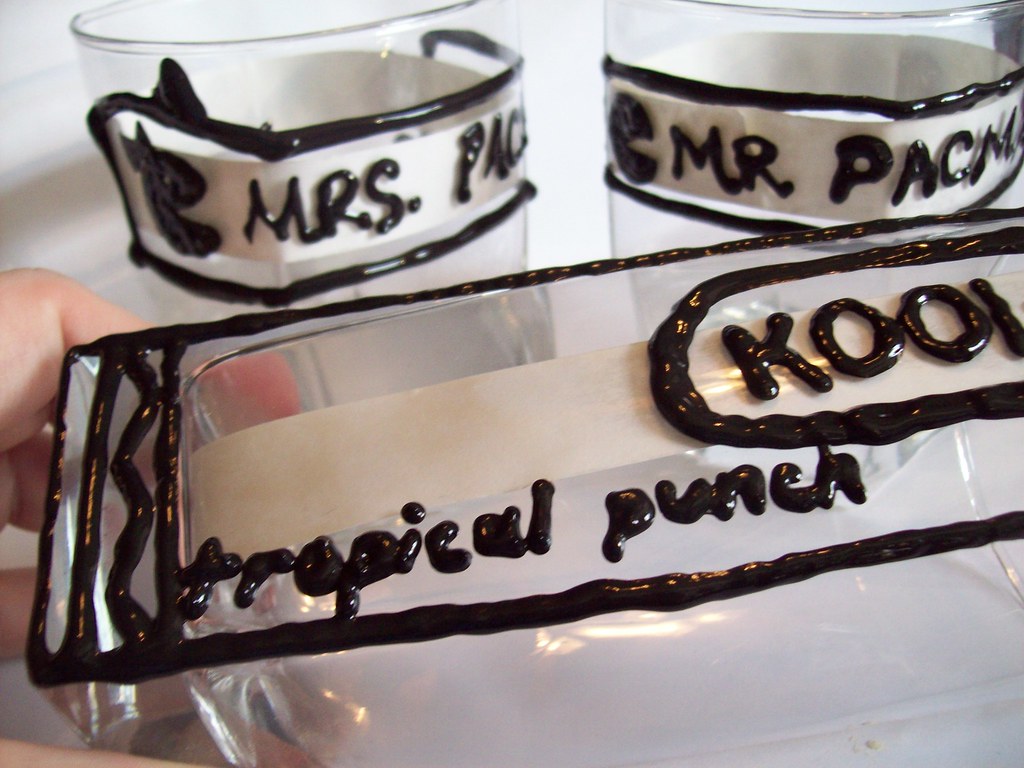
Step 5: Once you've completed your designed space, draw a barrier around it. This may be an oval, a stripe all away around the glass, some sort of crazy frame — whatever you like. Make this barrier nice and thick — double or triple the thickness of your other lines.
Step 6: Let the puffy paint dry. (I know, I'm forever doing this to you fine folks — gotta let it dry completely, which may be up to several hours or even overnight. Important step, though — patience is rewarded!)
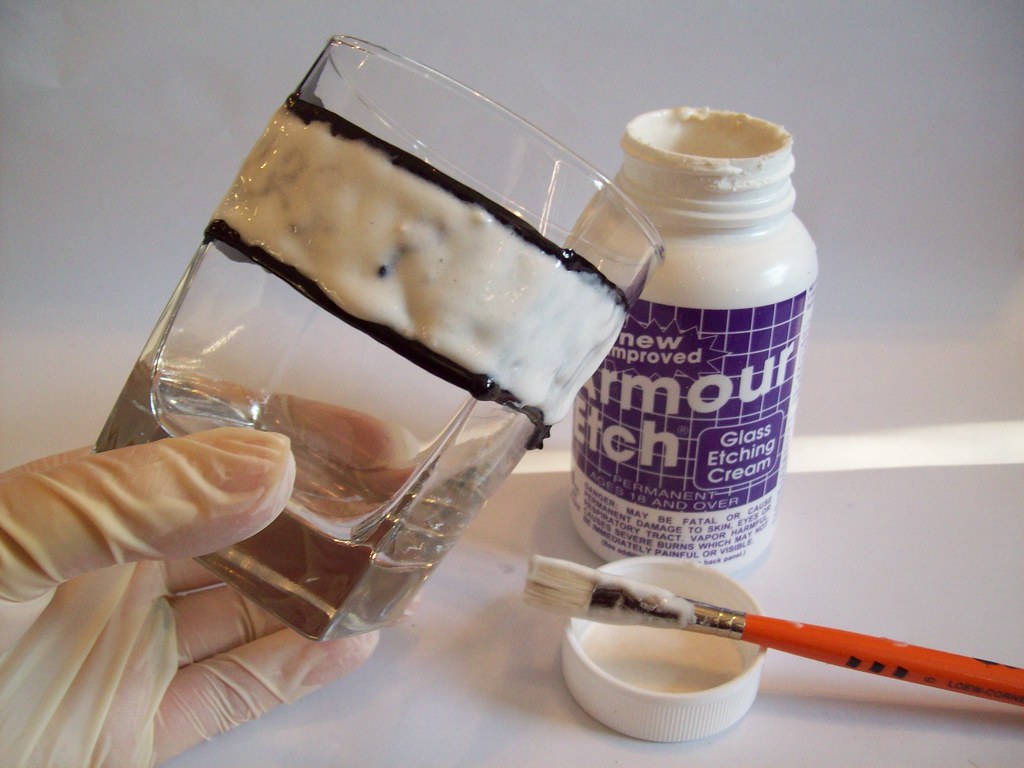
Step 7: Once dried, you can apply your etching cream according to the instructions on the bottle. Always be safe with this stuff — it etches glass, so it'll totally etch YOU too. Be generous with the goop, but don't let it drip outside your barrier. If you're doing more than one piece of glassware, complete this step one at a time. Trust me on this.
Step 8: After waiting for the etching cream's instructions time to pass, you can scoop any goop back into your bottle or go ahead and rinse your glass under running water, washing away any and all the cream, leaving just the puffy paint.
Step 9: Peel off the puffy paint — a fingernail will help you get the first piece going. Everywhere you painted was protected from the etching, and your background etched nicely.
Step 10: TaDa! Now repeat steps 7-9 for your other pieces. Puff, puff, paint, ladies and gents, and freehand your gorgeous glassware.
Applications:
You can use this on goblets, champagne flutes, beer steins, glass teacups, plates, platters — anything glass, really.
For plates and platters, to leave them food-safe, your best bet is to etch the bottom of the plate, so the design can be seen from the top, but won't etch the surface in contact with food. Make sure to write backwards, if you're using words/messages on plates and platters. One great gift version of this is to etch the bottom of a glass pyrex pan with a name, message, or favorite recipe.
Tips:
If you hate your design, just let it dry, peel it off, and try again (before etching, of course).
Some folks like to draw the barrier lines first. I find that if I do that, I drag my hands into them as I try to draw inside them.
As a “righty” I begin on the left of my design and continue to the right to avoid doing that. As a “lefty” I would reverse that — starting on the right and moving left.
Your Turn!
Will you brave freehanding your glassware? Comment below telling us how you plan to make this project your own. What kind of glassware will you embellish, and how?






This post is excellent! Putting the tape on the inside of the glass is really smart and something I would not have thought of until my 10th attempt if at all. The whole process is, of course, genius, but those little extras like the tip about putting a favorite recipe at the bottom of a Pyrex pan? Mwah!
I really loved the recipe on the Pyrex pan – Our family makes lasagna for Christmas and our family recipe on the bottom of a glass 13×9 pyrex = Christmas dinner for the college kids who can’t make it home = beloved.
Nice tutorial! The glasses would double up as a nice favor too.
Another option would be to use glass/ceramic markers. Not sure how it turns out on glasses, but I recently used them for creating mustache mugglies (on ceramic mugs) and those turned out incredibly cute.
I love ceramic markers for mugs! Haven’t tried them on glass – will have to experiment. Thanks for sharing the idea!
Just a recommendation for safety – the glass etch is hydrofluoric acid and will eat from skin through bone. The picture shows you wearing latex gloves. At a minimum – anyone doing this needs to be wearing nitrile gloves. You can find them at home depot (they’re either blue or purple). When I use this stuff, I also wear safety goggles because you are completely screwed if it gets in your eyes.
I did glass etching like this in high school, only on a mirror. It had a really cool effect.
I used the same chemical but used masking tape that we cut designs and words into to form the design. I used a precision craft knife to cut the design and it worked really well. Very nice clean lines.
Ah! I’m so scared about this stuff burning me up or something–I am that accident prone. It looks so awesome and hopefully cheaper than ordering customized etched glasses! I wonder if you could fill in “bubble letters” to get the actual letters etched and not the surrounding?
This is exactly what I was looking for! I’m planning on tracing some of my daughter’s drawings onto pilsner glasses for my husband for father’s day. Thanks so much for sharing!
My girlfriends and I are going to use this method to etch some plain shot glasses for Christmas/holiday gifts this year!