


Tribesmaid “Midgetskagem” has three different and equally awesome fabric flower making tutorials. So please to enjoy part one of a three part, fabric flower series and keep an eye out for parts two and three in the upcoming weeks!
 The backstory to these posts is that I’m looking to make my bouquet for my wedding myself, and so I’ve been brainstorming ideas on how best to put together fabric flowers for this purpose.
This tutorial is based on some flowers that I started making a few years ago — the folding technique is Japanese (Tsunami Kanzashi), though I’ve never successfully perfected the art of authentically creating these flowers — instead I opt for larger flowers held together with thread rather than using rice glue. I love the effect from these flowers, and this is probably the style I will be using for my bouquet.
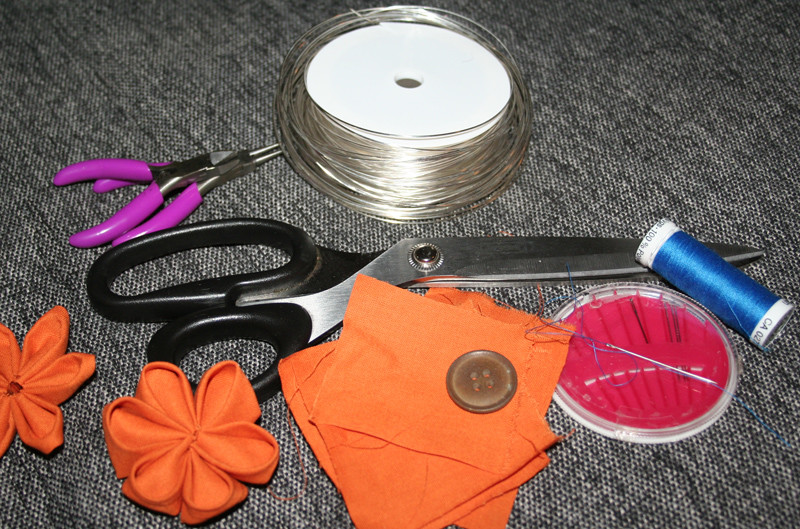
What you’ll need:

- fabric squares (my fabric squares are quite big — you can do them at pretty much any size)
- a needle
- thread
- scissors
- fabric glue
- malleable jewellry wire
- beads or some such to go in the middle
Step 1
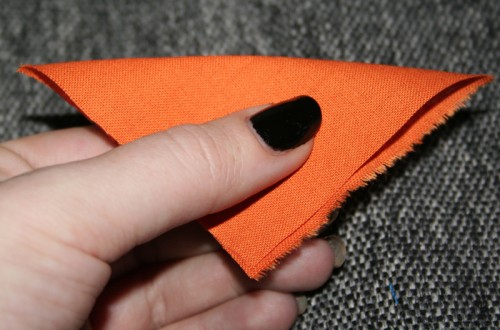 Fold the square diagonally in half. If your material has a better side then this wants to be on the outside.
Step 2
 Fold the edges down to the middle. Picture should explain better than my words here!
Step 2.5

…and repeat for the other edge.
Step 3
 Turn it over and fold the outer edge (with all the edges) in- again photo rocks, words suck.
Step 3.5
 …and the other one (ooooo it looks like a kite!).
Step 4
 Fold what you just folded back onto itself.
 And this is what it should look like the right way around.
Step 5
 Sew! Take care to get all the layers of fabric caught.
Step 6
 This method involves cutting, I do it now while the material is on the needle — you can see where I’m cutting — this is so the flower shall be a flower!

Step 7
 Rinse and repeat five times (for a six-petal flower) four times (for a five-petal flower), sew through the first petal again, and tie to create the flower in the round. A little tighter this time around.
Step 8

This is the back.
Step 8.5
 Here’s the front of the flower!
Step 9
 Fluff out the petals by placing your finger into the petals like so.
Step 10
 Choose your center embellishment. For these guys I threaded a button onto my wire.
Step 11
 Glue on the button, and threaded through — flower is complete.
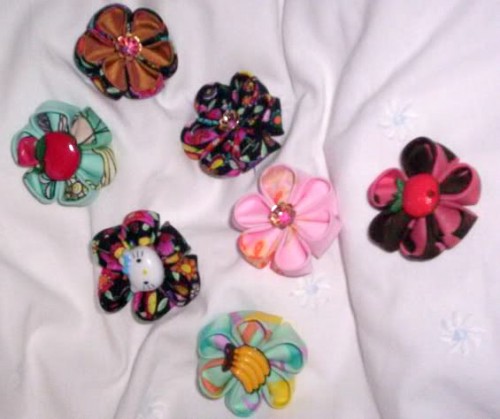
And here are some wee little alternatives and variants on the theme…






21 responses to “How to make semi-kanzashi-style fabric flowers (part 1)”
I L-O-V-E this!
I’ve been wondering what to do about my bouquet and that of my bridesmaids as I don’t want to pay silly money for real flowers.
These are so perfect, I can’t stop squeeing!
Aww thank you!
Those are beautiful! I’d seen Kanzashi flowers on etsy before and admired them. I may have to try my hand at making them! Thanks for the tutorial 🙂
There are some amazing flowers on etsy – I wish I had the patience to properly learn in some respects.
Thank you, and give it a go 😀
@Midgetskagem – I don’t think I’ve come across a tutorial for Kanzashi flowers that I was able to follow with as much ease as this one! Thank you thank you thank you! Now to play with bits of fabric while I wait for part two! ^_^
Awww thank you, thats really awesome to hear. I love that you can use scraps of fabric up too with these guys, that makes me quite squee in itself.
Yaaaaay gem! <3
This might be a part of a future tutorial, but I wanted to ask anywaaaaay… I see you do flowers with the petal tucked inside an outer one (the arrangement with three yellow flowers.) How do you achieve that?
At the first step rather than having just one piece of fabric folded, you fold another (which can be smaller but doesn’t have to be), placing it on the top of the first and then folding as usual.
I’ll take a picture explaining later on today if you like dootsie 🙂
awesooooooome 😀
i just decided yesterday to use the 1.5 years we still have to go to make most of the flowers for our fairy wedding myself. that way i’ll have a new hobby to keep me occupied, save loads of money (i sew a lot and love paper so there’s always tons of paper and fabric scraps around) and have more unusual theme-fitting flowers. AND i don’t have to panic two days before the wedding if all the fresh flowers are gonna be how i want them to be. mwahahaha.
i’ll put this tutorial (and pretty much all the others i found on here as well) to good use! ;D
I’ve already made a trial bouquet using kanzashi flowers and now I have plans to make a much bigger one as soon as I have the time.
I can’t wait to make my actual one next year when I get the material from my corset maker.
Love this idea!!! Thank you so much for sharing. I am enamored with this site and all of you ladies are gorgeous and great. Keep the porn coming!
Thank you so much for sharing this! I have been brainstorming ideas for my own DIY bouquet and love this idea!
I LOOOVE THESE!! I especially love the hello kitty one! could also be great for making head bands/hair clips ect for my neice!
thanks for sharring!!!
Wow, I think I finally found how I’m going to make my bouquet!
originally I wanted to make dress sashes for the brideswomen and I, but my dress would actually look really dumb with a sash. I’ve really been wanting to incorporate the sash fabric somewhere on me… how about making my bouquet’s flowers out of it? AWE. SOME.
Now, I have to ask… where are fabric series parts 2 & 3? I know they’re to come in the “upcoming weeks,” but my DIY self is impatient! 🙂
Part two is next Thursday and that’s all I got for you as far as dates right now. 😉
Thanks, Megan. I’ll await it with bated breath!
Thanks to your awesome tutorial, I’ve sent out a general invitation to friends & family to make these flowers for our wedding and send them in. (The site doesn’t allow scattered petals, so I’m going to have the flower girls hand out these flowers instead.)
At least one friend has instituted a flower-making craft night, and apparently my aunt and grandmother have not only become flower-making machines, but will also be teaching the technique to an excited fabric store employee in my grandmother’s small town. Thanks for starting so much fun!
These look absolutely amazing and the variety of fabric makes the posibilities limitless.
Wheres part three???
I did fabric flowers for my bridesmaids bouquets, corsages, and boutonnieres – pro-tip – if you cut your fabric in circles instead of squares, you don’t have to cut the points later!
What a breeze, thank you for the tutorial what an eye opener.
very nice and good step by step tutorial, have lots of scraps and wait for next step