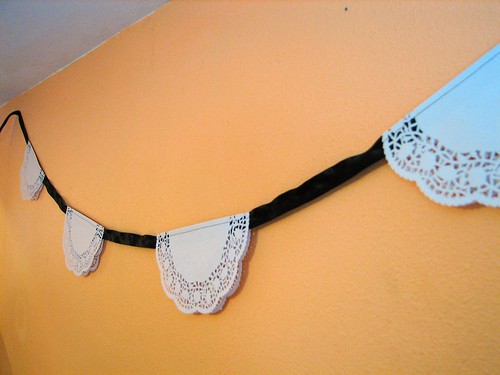
 When I found bunting flags I fell in love. My husband and I have a thing for decorative items and kitschy doo-dads hanging from the walls and the ceiling. Somehow a few pieces of art hanging on the walls feels a bit bland. We need mobiles! Flags! Strings of cheerful bunting!
In lieu of bunting banners, we had Mexican papel picado paper banners at our wedding. However, making buntings is an easy and super chic way to DIY and personalize your wedding space. Make it totally you!
So here 'tis! This is part one of a three part DIY series on DIYing festive wedding banners. I think it's the easiest DIY of the three, that's why we're beginning with this one. Just to give you a sneak peek, part two involves felt and embroidery… super fun craftin' times!
- 10″ paper doilies (you can also mix it up with the multi-size doily pack or with a colored doily pack)
- grosgrain ribbon (or similar), about 1/2″ x however long you want it
- thread (I would suggest using the same color as your ribbon)
- scissors
- pins
- ruler or measuring tape
- Fray check (optional)
- sewing machine and sewing skills (if you're a sewing novice, that's okay!)
 How to DIY a felt bunting wedding banner
Bunting banners are a fabulous way to make your special day all yours. DIYing and making can help you save money, explore your own creativity... Read more
Gather all your materials. Cut the ribbon to the length you'd like it to be. For this tutorial, I did a mini version that was approximately 2.5 yards long. Apply fray check to the ends of the cut ribbon to prevent fraying. Mark the center of your ribbon with a pin, so you have that center point to work from.
Step 2:
Fold a paper doily in half and crease it with your fingernail or a bone folder. Envelop the ribbon on the inside of the folded doily, running up against the folded edge inside. Make sure the inside folded edge and the edge of your ribbon match up.
Start by placing the first one “x” inches away from your center point. When you go to place your next one, double that measurement for the spacing. I spaced mine 2″ from my center point, so that each doily was 4″ apart from each other. Pin each one to the ribbon as you go, pinning on the left and right sides of the doilies to make sure they don't shift during sewing.
A GREAT idea to tie in the theme: use paper doilies as place mats at your guest's seating. You could even write their name on the doily as a place card!
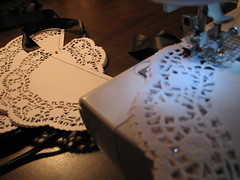
Continue pinning all your doilies in place. Once you have them all pinned and lookin' purty then take the whole shebang over to the sewing machine. You're going to want to sew each doily onto the ribbon, starting from 1/4″-1/2″ from the outside edge of the doily all the way across, and finish 1/4″-1/2″ on the OTHER side of the doily.
In other words, only sew from one side of the doily to the other, not across the entire length of ribbon. If you sew from one end of the ribbon to the other it's likely that the ribbon will  bunch and hang weird, which I tend to like but you may feel differently.
Step 4:
Trim all the loose threads hanging around your doilies. Hang up your doily banner and be amazed at the elegant simplicity! I love the contrast of the white on the black ribbon but you could flip the colors around any way you want.
Get ready for parts two and three comin' at you in the very near future! Please post pics of your banner creations if you try it out.
The banner I made for this tutorial post is now up in my Etsy shop! I can make custom lengths, colors and designs… so if you're itching for the handmade look but don't have the time or the skillz gimme a shout! – Offbeat Shrie


“this photo is currently unavailable” 🙁
Fixed. DOH!
Perfect! I love doilies 🙂
Me too! I would be interested to see what a colored doily version would look like. Probably pretty sweet!
Just found this great tutorial on dying paper doilies! What luck… these would look fab.
http://blog.craftzine.com/archive/2010/05/how-to_dye_paper_doilies.html
Amazing! I was thinking about dying the doilies because I am using them to stencil on a round design on invites. That would be a perfect use for the left overs.
I love being creative and thinking outside the box. This is a unique idea. Making your wedding day your own, is the best way to make a memory that last a liftetime!